

Lightroom tutorial #2: Basic adjustments and presets
Welcome to my second part of the Lightroom basics tutorial. This time we will start editing our first photo using basic adjustment panel. We will also learn how to use presets to fast one-click photo edit. If you want to read the first part of this course, see Lightroom basics tutorial.
We already learned about main parts of the Lightroom, we also know how to import our photos. Now it's time to start the most important process, photo editing. Let's start by learning basic adjustment panel.
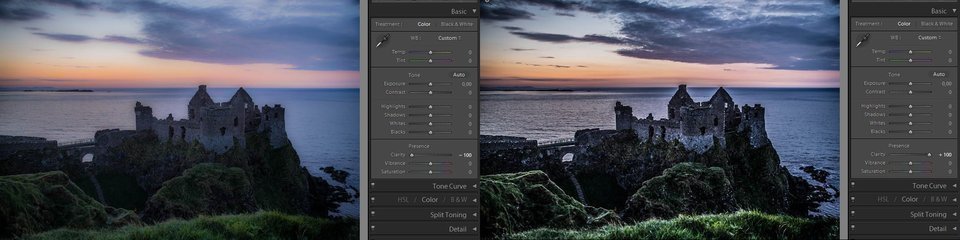
Warning: On the right, you can find an original file. We will add our basic adjustments to it.
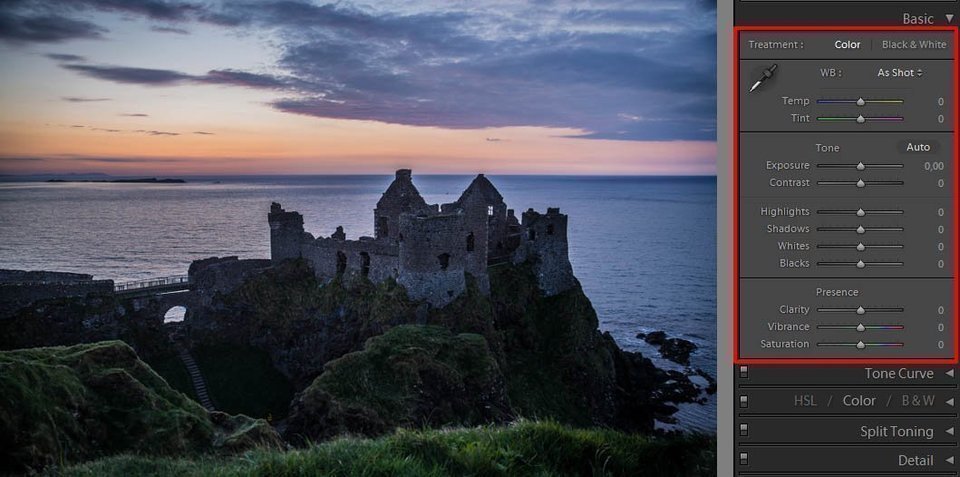
Basic adjustment panel
The basic adjustment panel is very important for basic photo-processing in Lightroom because you can achieve a huge effect by just a little effort. To do this, we must learn how individual adjustment sliders work.
Temp
Temp can be used to tune the white balance. It uses Kelvin color temperature scale. If you will move temp slider to the right, your photo will become warmer, and if you will slide it to the left, the image will be cooler.
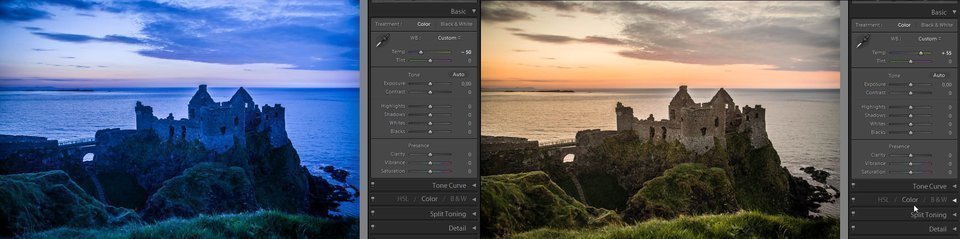
If you want, you can click on the number placed on the right of the slider and give a specific number of the temperature.
Tint
Very similar to temperature. Using tint you can also adjust white balance, but this time to compensate for a green and magenta colors. By moving your slider to the left you will increase green colors on your photo, and by moving it to the right, your image will become more magenta.

Exposure
Exposure can be used to set the brightness of an image. Slide to the left to make you photo darker and to the right and your photography will become lighter.
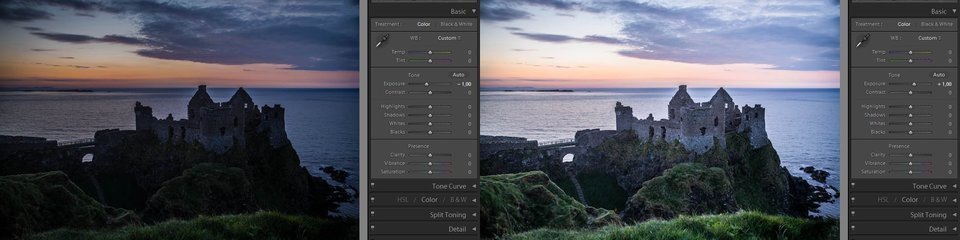
Values of this exposure settings are in increments equivalent to aperture values (f‑stops) on your camera. One slider value is like one stop.
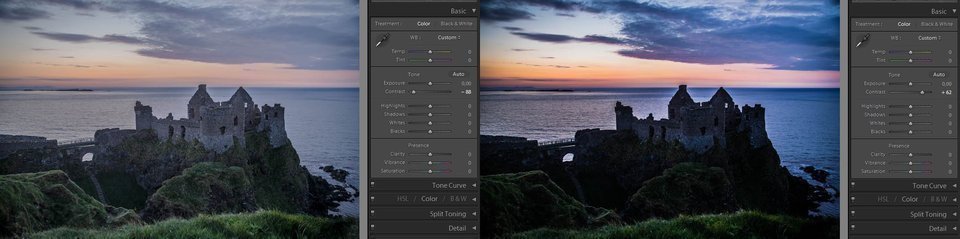
Contrast
By using contrast you can affect middle tones. If you increase contrast (slider to the right) middle-to-dark area of your photography will become dark. Decreasing the contrast will make it lighter.
Highlights
By using highlights, you can adjust bright parts of your photography. Changing slider to the left will make it darker, so you will be able to recover "blown out" highlight details while dragging the slider to the right will make it lighter and you will minimalize the clipping.

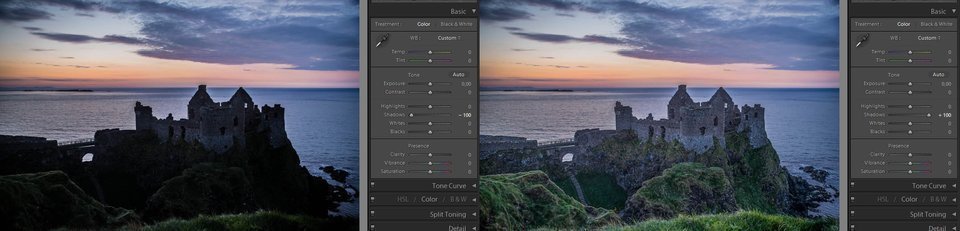
Shadows
By using the shadows slider, you can adjust dark areas if your image. If you will drag it to the right, you will make shadows brighter, so you can recover details in too dark places. Dragging shadows slider to the left will make it darker.
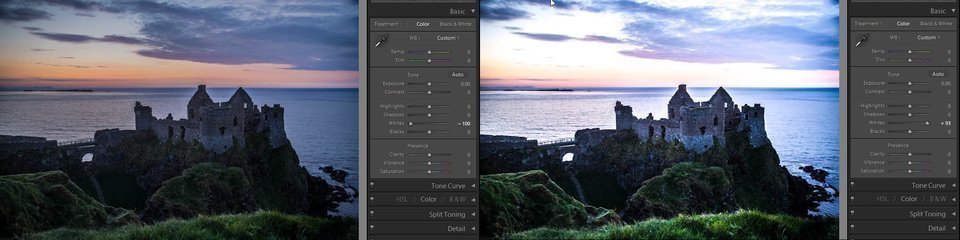
Whites
Using whites, you can adjust white clipping on your photography. Slide it to the left to reduce highlights clipping, and to the right to increase it.
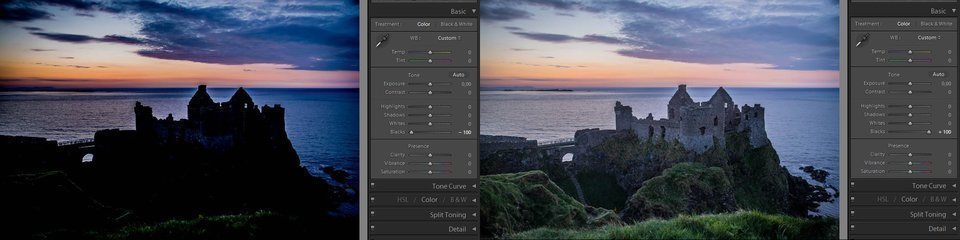
Blacks
By using black clipping adjustment you can map more shadows to pure black or reduce shadow clipping if you slide it to the right.
Clarity
This is a very interesting adjustment and personally one of my favorites. Clarity adds depth to a photography by increasing local contrast.
Vibrance
This is the upgraded version of the saturation adjustment described below. Vibrance change the saturation of all lower-saturated colors with less effect on the higher ones.

Saturation
This setting adjusts the saturation of all image colors from monochrome to double saturation.

Now you have learned about all the adjustments in the basic panel. Now it's time to adjust your own photos to get more experience. Only this way you will truly learn how to use all these basic panel adjustments.
Presets
We already learned how to use basic Lightroom adjustments. Imagine now the situation, that you have to post-processing 100 similar photos from, for example, a concert or other event. It would take the whole eternity to do this. Here comes the presets for help.
What are presets?
Okey, so what exactly are those presets? If you make some good adjustments, you can then save it into preset for later use. These saved settings are known as Presets.
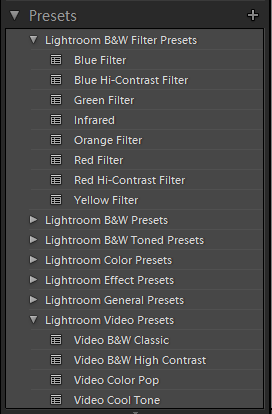
Where to find it? On the develop module you can find the Presets panel on the left side of the screen.
How to add preset?
To create your own preset, you must firstly set your photo adjustments. Open Lightroom, import your photo and go to the Develop module. Using adjustment sliders create your preset settings.
If you did this, now it's time to create our preset. On the left side of the screen, you can see presets panel and the small plus icon on the top-right of this panel. To save your preset, click it.
You will see a new window where you have to choose what elements you want to save in presets and write its name. If you set everything, click create button. Your new preset will be now available inside the presets panel.
Conclusion
I hope you enjoyed this second part of Lightroom basics tutorial. This time we learned how to simply edit our photo adjustments and settings and how to save them into presets. You can now make your first basic photo post-processing.
Now it's time to experiment with your own photos to get some more experience. Good luck!

My name is Wojtek and I am very happy that you came to my photography blog. I started my adventure with photography a few years ago and all I know, I learned myself, mainly from the Internet (which proves that for those who want nothing is difficult).
If you liked this article, be sure to leave a comment and read some more!
Read the next article in this series:
Lightroom tutorial #3: Crop, adjustment brush, filters and spot removal-
-
Fshoq!2nd May 2017, 17:44
Thank you Marcus, new Lightroom basics tutorial will be here pretty soon, so come back to my photography blog once in a while.
-
-
Grammer1st May 2017, 13:16
Wow, this is a huge Lightroom tutorial. Thanks for those images that explain all the effects, its now much easier to understand it.
-
Fshoq!2nd May 2017, 17:45
No problem mate. Im glad you like this tutorial.
-
-
Grazyna11th November 2017, 14:39
Thanks for sharing your info. I truly appreciate your efforts and I will be waiting for your next write ups thank you once again.
-
Gregory13th November 2017, 15:44
This Lightroom basic adjustments presets tutorial is awesome, thanks for that!
-
karola7th August 2018, 23:02
Super teacher :) Thank you I understood what it seemed to me not understood. This text was translated automatically. Original text is below: Super nauczyciel :) Dziękuję zrozumiałam to co wydawało mi się nie pojęte.


Finally, we got to the photo editing! :-) Thanks for this basic Lightroom tutorial, hope you will write next part soon.