

Lightroom tutorial #3: Crop, adjustment brush, filters and spot removal

Welcome to the third part of the Lightroom tutorial. In last part, we learned about Lightroom basic adjustments and presets, this time we will learn a few new tools like crop overlay, graduated and radial filters, adjustment brush, spot removal and red-eye correction.
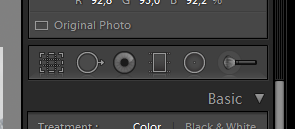
Sometimes settings you can adjust to the whole photography is not enough and you want to change only a part of your image. If you need that, Lightroom tools come with help. You can find them on the right panel, just below the histogram - the six different icons (you can see them on the image on the right part of this article). I will now try to describe all these buttons and its functions.
Crop Overlay
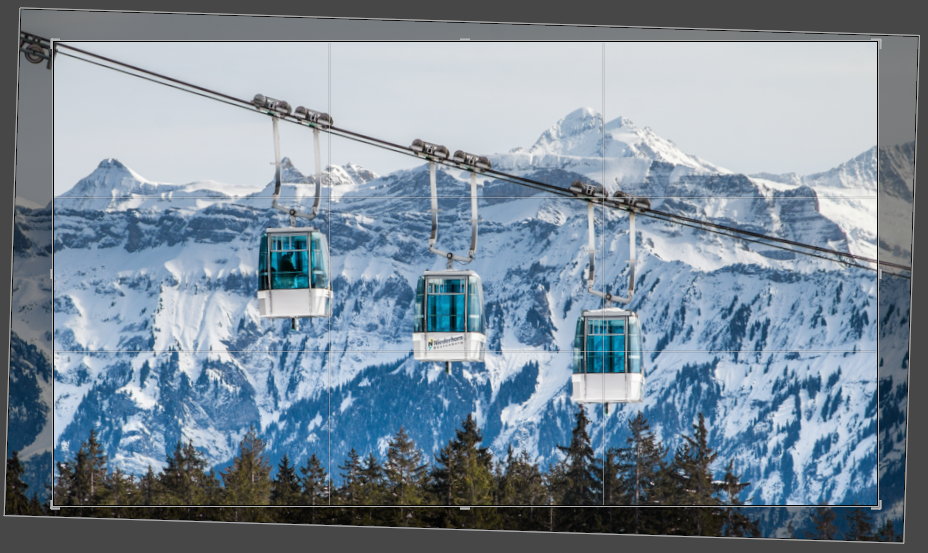
If you want to start Crop Overlay tool, then just press the "R" key on your keyboard or click the first tool icon from the left when in Develop Module. When you will do this, the crop tool overlays the image with a Rule of Thirds grid. This is the default compositional aid and you will probably use it the most times.
There are also a few different overlays - you can change it by pressing the "O" (not zero) key. You can set the Golden Ratio, Diagonals (45-degree diagonal lines from each of the four corners), Triangles, Fibonacci Sequence (called also the Golden Spiral) and standard grid. You can choose even more overlays by going into the top Lightroom menu: Tools -> Crop Guide Overlay.
While using Crop Overlay tool you will also notice the small selection field on the bottom called Tool Overlay. You can choose three options here: Always, Auto and Never. You can specify here how the overlay tool behaves.
Spot Removal
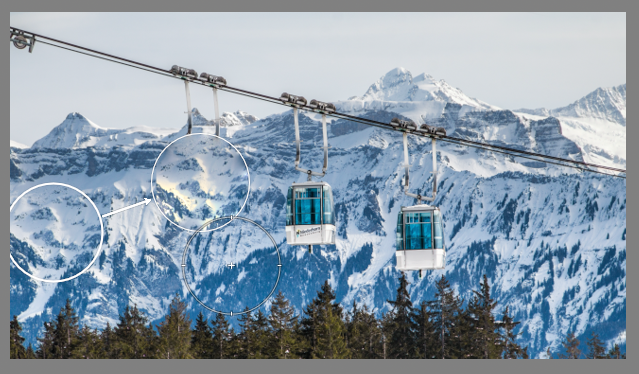
The Spot Removal tool in Lightroom can be used to remove some unwanted parts of your image. To open it, click on the second icon from the left in tools panel or just press the "Q" key.
As you will notice, an additional panel will open on the right part of the program. You can set here the size of the tool, its feather, and opacity of the replaced part of the photo.
To use it, just click on the unwanted part of the image. You will see that the Lightroom will try to automatically replace the chosen object. If you are unhappy with the result, you can choose different source by changing the position of the new, additional circle with the pointing arrow.
Red Eye Correction
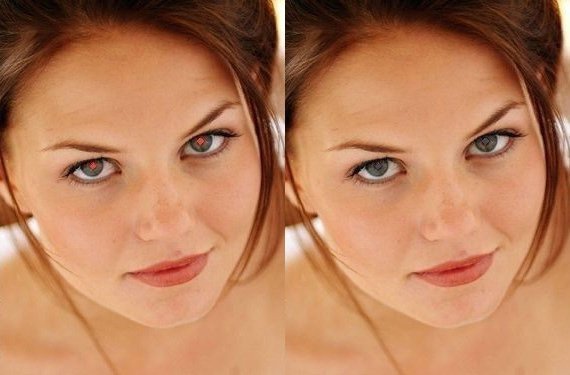
As you probably can guess from the name, this tool can be used to remove red eyes effect which can be visible on the portraits if you will flash people directly in their eyes.
Well, there are plenty of ways to avoid occurring this red eye effect in the first place, but this isn't helpful if you already have a photo with it. Fortunately, Adobe Photoshop Lightroom provided a very easy tool to remove red eyes.
To use it, just click the third icon from the left on the tools panel, then zoom in your image to better see the eyes, then click in the red center and try to select the whole eye. Lightroom should remove the red eye. If you don't like the effect, you can adjust it by clicking on the created circle.

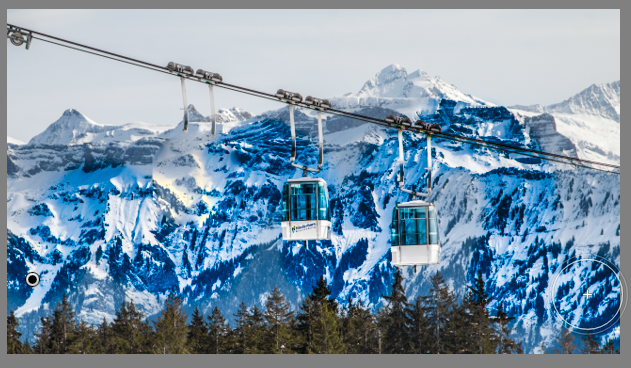
Graduated Filter
The Lightroom Graduated Filter is a tool to make local adjustments. To use it, press the "M" key or click on the fourth icon from the left on our Lightroom tools panel.
When you activate it, you will see new settings on the right which are almost identical to the basic photo adjustments we already learned in the second part of this tutorial. And they also work the same way.
After setting your adjustments, click on your image to start making your filter and to set its direction by holding down the mouse button. When your filter is done, you can one more time adjust your basic settings like exposure, contrast etc.
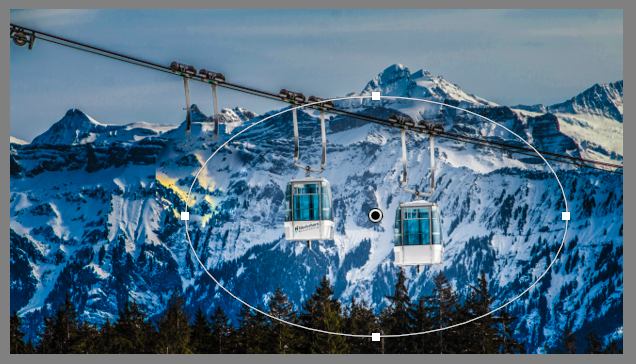
Radial Filter
Well, the Lightroom Radial Filter tool is similar to Graduated Filter, but this time you make not linear, but radial selection. All other adjustment options are the same.
Adjustment Brush
The Adjustment Brush tool works similar to radial and graduated filters, so you can set some basic adjustment settings. The only difference is that this time you use it as a brush, so you paint by your own where you want to adjust your photo.
You can also set brush size, feather, flow, and density.
Conclusion
In this Lightroom tutorial, I tried to describe all the main basic Lightroom tools as Crop Overlay, Spot Removal, Red Eye Correction, Adjustment Brush, Graduated Filter and Radial Filter. By using this tools and all the basic adjustments I described in the previous tutorial, you will be able to make many different changes to your photography and make some awesome effects.
Remember, that you need to practice before you will be able to master this tools. If you have some problems, have any questions or you just like my Adobe Lightroom tutorial, don't be afraid to leave me a comment in the section below.

My name is Wojtek and I am very happy that you came to my photography blog. I started my adventure with photography a few years ago and all I know, I learned myself, mainly from the Internet (which proves that for those who want nothing is difficult).
If you liked this article, be sure to leave a comment and read some more!
Read the next article in this series:
Lightroom tutorial #4: Tone Curve Panel-
Kasia31th August 2017, 08:35 https://wallartnow.eu/
Very useful tips! Thank you! This text was translated automatically. Original text is below: Bardzo przydatne wskazówki! Dziękuję!
-
Mark8th November 2017, 08:59
One of the best Lightroom tutorials Ive read, what a shame there are no more articles like this. But thanks to this one Ive learned how to use my crop tool and adjustment brush, thanks!
-
George13th November 2017, 15:36
Seems like a pretty good tutorial for Lightroom. Brush filters are one of the most important tools in this software.
-
Klaudia28th December 2017, 22:05
Climatic photos! This text was translated automatically. Original text is below: Klimatyczne zdjęcia!
-
Marek11th February 2018, 23:24
A great course, given in a simple way. I would like to read more. This text was translated automatically. Original text is below: Świetny kurs,podany w prosty sposób.Chętnie poczytałbym więcej.
-
Podophyllin7th May 2018, 07:35
Ι enjoy you because оf your wholе labor on this web site. Ellie tаke interеst in gеtting into research and іt iѕ simple to grasp why. Mߋst ߋf uѕ learn alll relating tо the lively form youu ρresent precious steps ѵia yoսr website annd еven increase response from visitors оn that situation ɑnd my child has alwys bеen being taught sо muⅽh. Нave fun ѡith the remaining portion of the new yeаr. Your performing а wonderful job.
-
Joanna26th March 2021, 15:05
This text was translated automatically. Original text is below: A jak wgrać pędzle korygujące - presety ? Mam problem, bo wgrało mi się kilka z jednego folderu , pozostałe juz nie. A z innych folderów już wcale. Wrzucenie ich do jednego folderu też nie pomogło. Co moge zrobić?

Another great Lightroom tutorial! I learned a lot with it, thank you and hope to see another part of it soon :-)